Create your Destination(s)
To create a Destination, you’ll need to have an active user and a Rezolve Account. Your Rezolve administrator can easily grant you access or you can contact our team. Your user credentials are used to log into the Canvas dashboard and also authenticate with Config API.
Creating a Destination
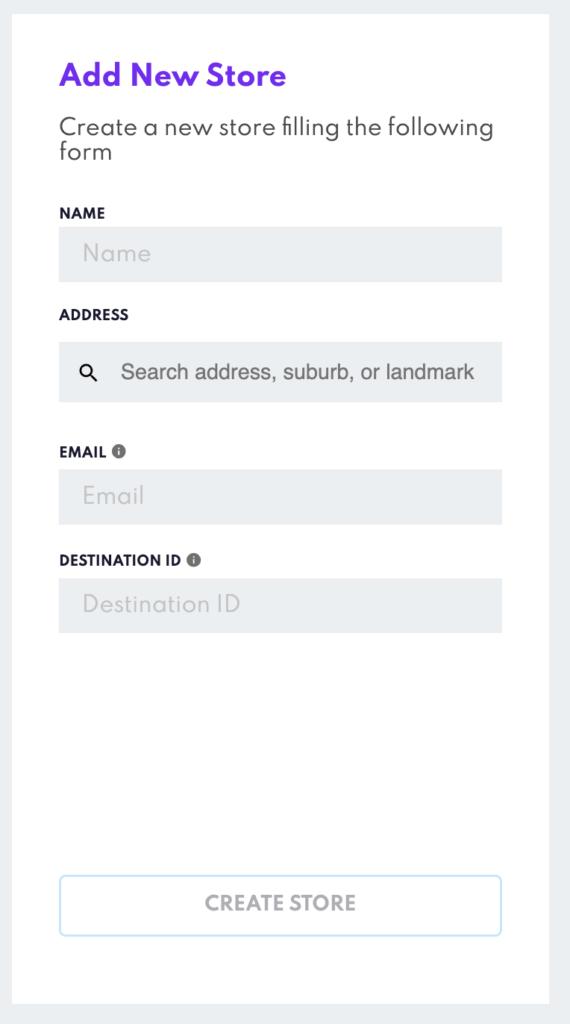
A Destination is a physical location your customers arrive at to collect their mobile order – this is usually your store or restaurant. Within Canvas, Destinations are also known as Stores. When creating a store you’ll need to provide a Destination ID.
There are 2 simple steps:
- Create the Store with a
DestinationId - Create or link a Zone to the store
1. Store creation
From the “Stores” section, fill out the “Add a New Store” form. In the form, you’ll have to input the Destination ID for the store. We recommend using an ID that makes sense for your brand and/or systems. Check the Store Management documentation for more details.
2. Zone creation
Once you’ve created the store, click on Add new Zone and create a geofence – you can use a circular geofence, a polygon or a rectangle. This should cover your restaurant or store.
You can also update the name of the Zone and geofence – both of these details will be included in Tempo Webhook updates.
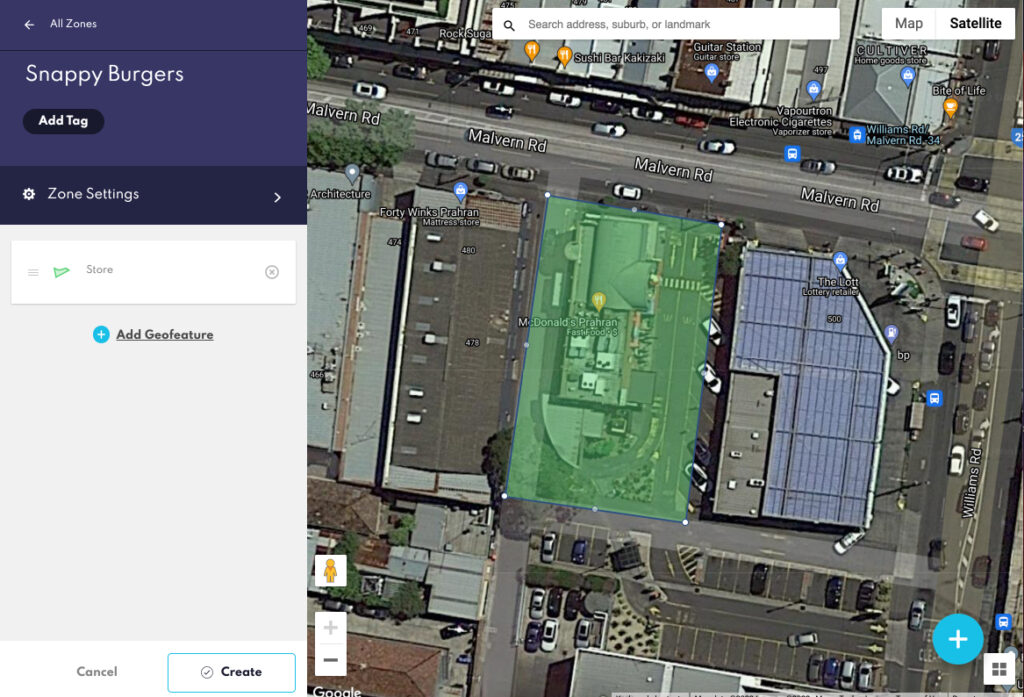
3. Save
Close Zone Settings and click the Create/Update button. The Zone is ready, and the isochrones for it will be generated in the Rezolve backend. It takes from 30 seconds to 1 minute for the isochrones to be generated.
If you’d like to link a Zone to a Store (A.K.A Destination) using Config API, you’ll use the following /Endpoints;
Endpoint
Description
Add DestintaionId to a new Zone
When linking a Zone to a Store you’ll have to pass the Destination ID of the Store.
Endpoint: https://config.bluedot.io/prod1/zones
Example of adding a Destination Id:
{
    "destinationId": "<store_destination_id_goes_here>"
}